Friday, January 31, 2014

SinfulColors |Green Jelly sandwich

I've been playing around with different "Jelly/gelly sandwiches" and going through my stash of gel formula polishes to test out with this technique.
Green happens to be one of my favorite colors so there was no hesitation needed when I put this beautiful combo together. Before I knew what a "jelly/gelly" sandwich was and I'd run across the gel formulas I would be disappointed. Now I'm on the hunt for them as this has become fascinating to me! I thought I had more gel textured polishes in my stash but I don't. So let the hunt continue!!
Here I used SinfulColors "Irish Green" as a base and topper. I used two base coats of this and and I used 1 thin coat of Salon Perfect in "Kaboom" in the middle.
Have you tried a "Jelly Sandwich"? If so what are some of your favorite combos?
Thanks for reading!

Thursday, January 30, 2014

Cuticle cream:Hard as hoof


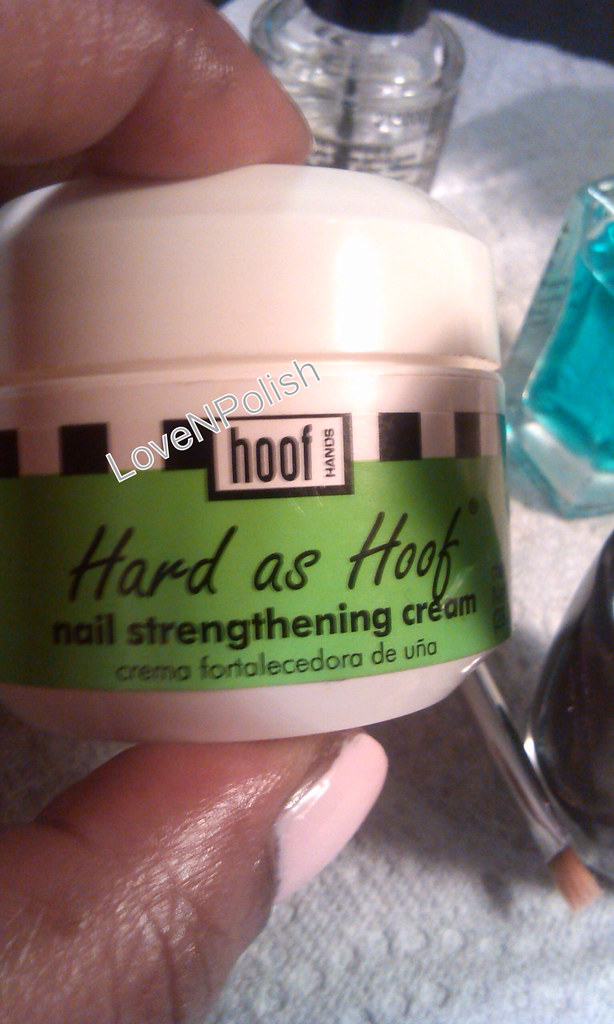
I'd say about 2 months after I came out of acrylics I stumbled upon this cuticle cream. I had always had weak nails, mostly due to keeping my hands in water the majority of my day.

All I wanted was strong nails. After a week or so of using this product I was sold! My nails became hard seemed like instantly. I did apply it almost 3-4 times through out the day and once again at night before bed.

After getting my nail strength up and my nails began to grow rapidly . Almost to the point they were too long for me to handle! I began to slack up on using it. Needless to say my nails began to break, but remained rather strong. I eventually had fell off the wagon and stopped using it all together. I thought my base coat I was using was aiding in my nail strength.

Fast forward. This winter has been rough on my hands and nails. I had start to notice my nails were peeling and very dry along with my cuticles. I also began to get a few hang nails here and there. I've tried to narrow down what it could be. I research all the time and I was researching and scrolling through Instagram the other day and someone had a pic of this and a light bulb went off! Duhhhh I needed to go back to what worked!!

I also discovered my trusty OPI Nail Envy original may also be contributing to the peeling. I had been using it religiously for I know a year straight! So for my last manicure I switched back to what I used when coming out of acrylics which was my nail tek II. So I will see how it goes . But I will definitely keep hard as hoof as my daily cuticle cream along with my regular cuticle oil mix.

I hope this post was helpful for anyone trying to repair their nails and build unbelievable strength!


Wednesday, January 29, 2014

Essie Pound Cake | Chevrons and a Sugar Rush

So this manicure ended up much different than I envisioned. That always seem to be the case.
I picked up a few polishes the other day and for today's manicure the Milani stood out the most for me to use. When I bought it I wanted to make a "jelly sandwich" with it. I thought that a nude polish would definitely give the reflects of peach, gold and green in this polish a perfect backdrop.
So I decided to go with my Essie "Pound Cake". Oh and BTW the name of the Milani polish is "Sugar Rush". How fitting! One big ole sweet idea...pun intended.:) I normally do a test run on a nail prior to my bases that I use. With my test run the "pound cake" seemed to be of jelly texture and less opaque. So I made the sandwich and it looked pretty good. I also decided I was going to do the tape method of making chevrons and add those to the accent nails. No need to practice that because it seemed simple enough right? Wrong? Lol I used the wrong tape and with my first nail it wasn't dry enough, too much glitter polish(salon care by sally Hansen) and pulled up some of the polish. Omg what a mess!

After I applied my first coat of "pound cake" it had that jelly formula but it appeared to be more opaque. I decided to skip the Jelly sandwich and wear the "sugar rush" just as a top layer. Once the chevron design went to the left I decided a single chevron would work well with a silvery/goldish striping polish. Needless to say this was the outcome.

Here is a pic of "Pound Cake" with no topcoat.
I'm also working on my lighting and camera settings so my quality of pics hopefully will improve soon. Thanks for reading!

Tuesday, January 28, 2014

My first attempt at Ikat nails

Hi everyone and welcome to my blog.  This is so overdo!  I've been wanting to blog about polish for so long now and finally decided to dive right  in! 

So I've been addicted to polish for a while now and have been following nail enthusiast like myself.  Here lately I've found so many new nail bloggers and polish lovers on Instagram.  I really had no clue as to how many people really loved nail polish like myself.  So needless to say I've come across some  great nail art and polish swatches to say the least.  But one design I've seen for some time and actually it took some time to grow on me is the Ikat nail art.  When I first saw the design I thought its was just ok.  I guess repetition will have you consider some things huh?  I decided to give it a try yesterday for my weekly manicure. 

I posted it on my Instagram and people seemed to like it but I did put out there that it was my first attempt at the design.  The more I looked at my nails the design grew on me.  I was more impressed with my clean up job to be hsedonest. Haha!  I will definitely give it another try.

I used  beauty supply store brand polish called Nicka K as a base.  The polish didn't have a name but its a very pretty tiffany blue polish.  For the design of the Ikat I used other opaque polishes in my stash and for a few of them some black and white acrylic paint just to see which would work best. 

Thanks so much for reading and allowing me to share what I love.  I'm still a work in progress but as one of my friends said.."Practice makes Perfect".